This guide will walk you through onboarding, starting a workout, uploading your data, and reviewing your results.
Step 1: Complete Onboarding
When you first set up WurQ, the onboarding will guide you through:
How to wear the sensors
How to connect the sensors
How to pair the sensors to your app
Make sure your BLUETOOTH ON on your iPhone before beginning.
When you first open your app you will be greeted with this screen, when ready tap the "Get Started" button
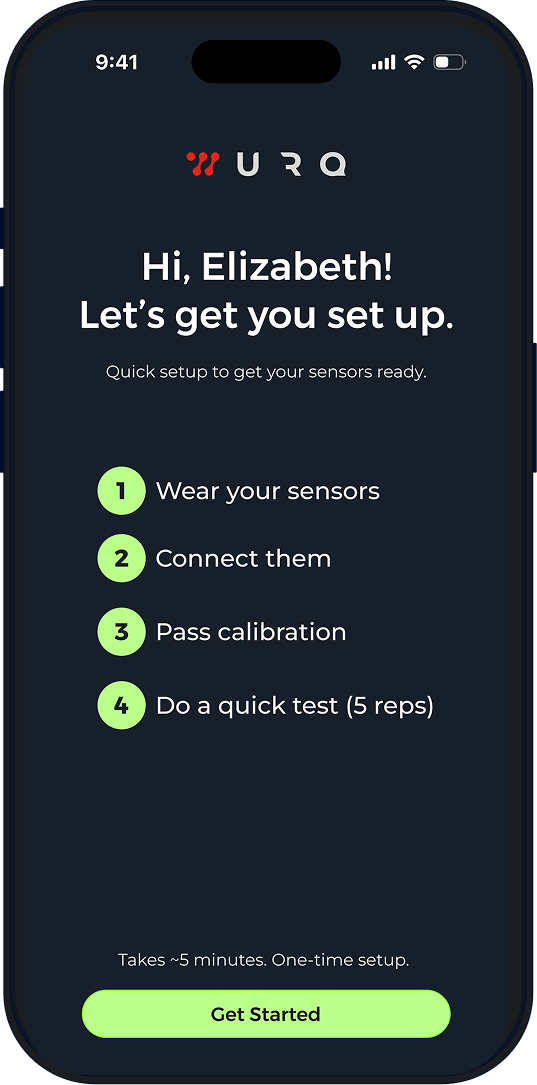
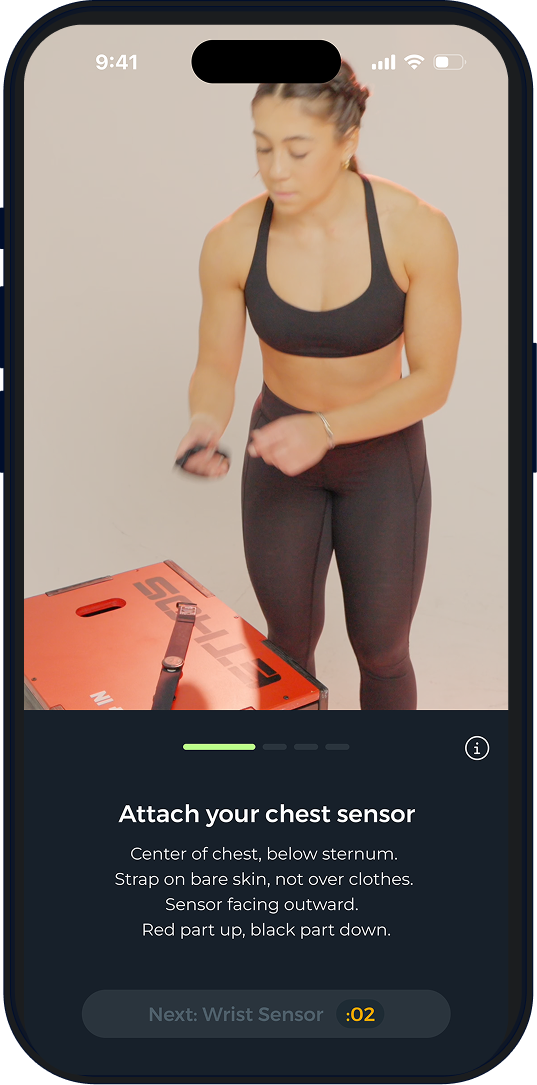
First, you will attach your chest sensor. Place it in the middle of your body, right below your chest. Adjust the band if needed. Make sure it is touching your skin directly.
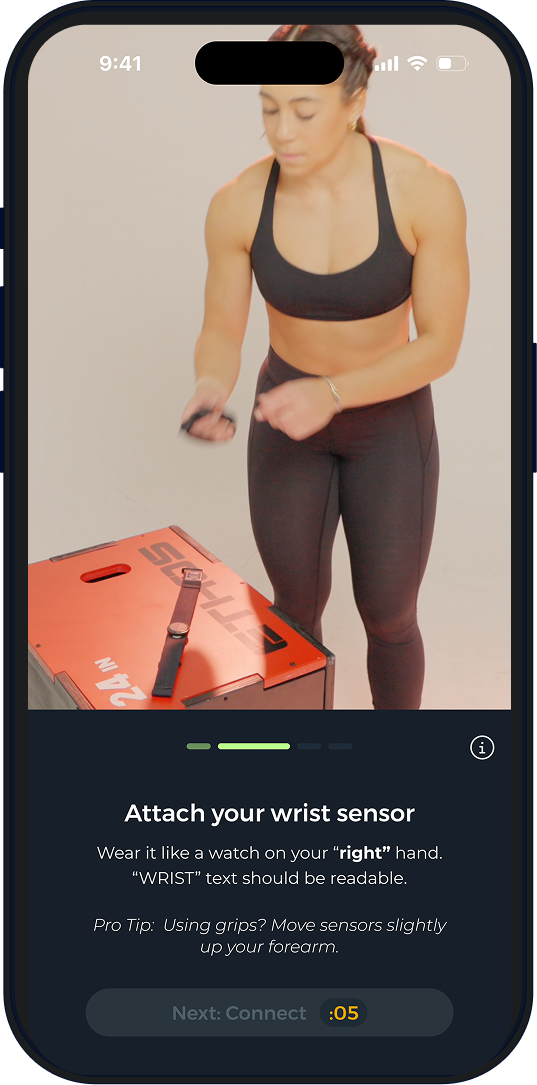
Once your chest sensor is on and secured, attach your wrist sensor. You need to make sure that it is tightly on your RIGHT wrist with the text facing up. If it is upside down or on your left wrist, the results will not be accurate.
Once both sensors are on correctly tap the "Connect" button. This will bring you to a screen where you can select your sensor pair. Once you find your sensor pair, click it. You will then be instructed to name your sensor. Once you do this, you will be brought to the calibration screen.
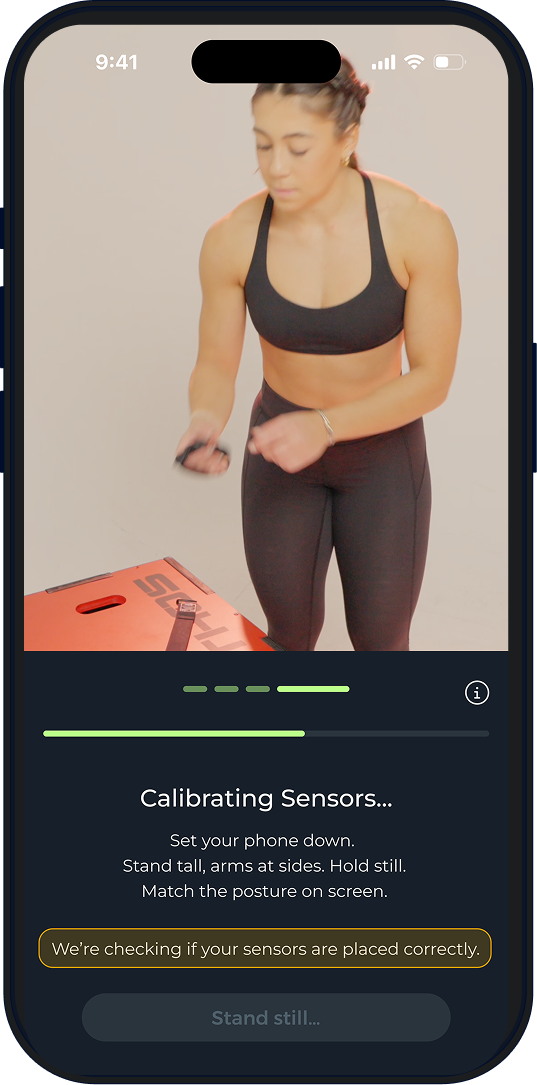
To ensure that the sensors calibrate properly, you must stand up straight with your arms by your side and hold still. Do not move while they calibrate. Once the calibration is finished, you will automatically be brought to this screen:
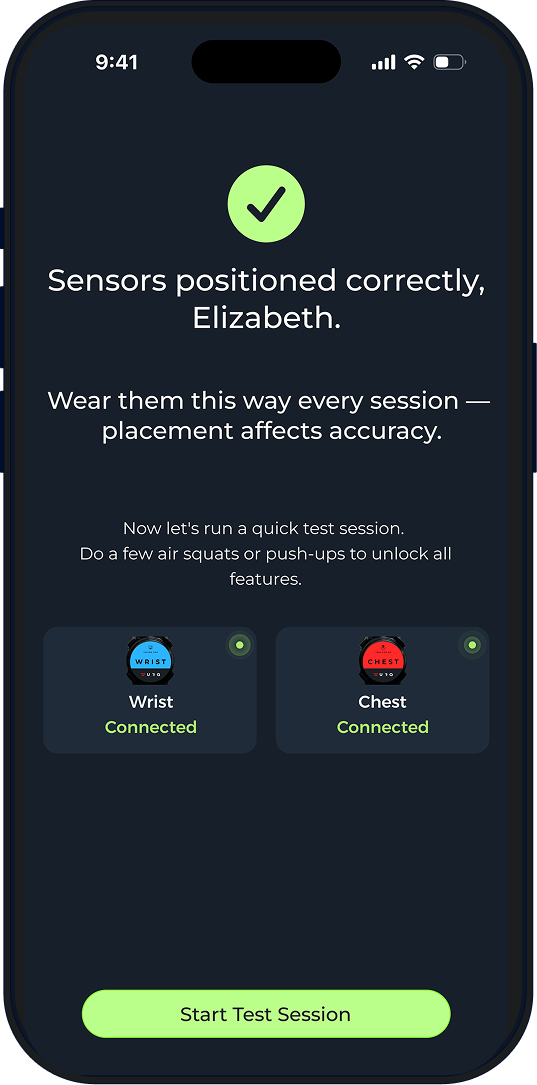
From here, you can now start a test session. You will be able to do a freestyle session to test your sensors and to get an understanding of how the product works.
Connect and Pair Sensors
Turn Bluetooth ON on your iPhone.
Put on the chest sensor. It will automatically turn on when touching your skin.
Open the WurQ app and tap Connect Sensors.
Select both sensors when they appear.
Rename them when prompted.
After pairing once, the sensors will automatically connect for future workouts.
Important: Do not pair sensors through iPhone Bluetooth settings. Always connect inside the WurQ app.
Step 2: Choose Your Workout (Freestyle vs Programmed WOD)
You can start workouts in two ways:
Freestyle WOD
Use this when:
You are doing your own workout
Your gym programming is not in WurQ
You are doing strength, accessory work, or custom WODs
Freestyle lets WurQ detect movements automatically without needing a predefined workout.
Programmed WOD.
Use this when:
You follow Mayhem, PRVN, CAP, HWPO, or other supported programming
You want to compare results and see where you stack on the leaderboard
The workout is already built in the app
You can create your own Training Program here
Navigate to admin.wurq.io.
Create a Training program and Name it.
Create WODs and add them to your Training program.
You can open the WOD Details page to:
See workout structure
View leaderboard
Check average timing and fastest timing.
Step 3: Start and Stop Workout Logic
Tap Start to begin.
Important Start Logic
The workout timing officially starts when:
You perform your first movement, not when the timer starts
Stopping the Workout
When you finish:
Hold to Stop
This ends the workout and begins the upload process
Step 5: Uploading Your Workout Data
After you stop the workout, the upload screen will appear.
You will see a progress bar from 1% to 100%.
Upload Phases
1–50% → Dowloading data from sensors to your phone
50–100% → Uploading data from phone to WurQ cloud
Once this reaches 100%, your workout will begin processing.
Step 6: Processing and Draft Results
After uploading, WurQ processes your workout and generates Draft Results.
In Draft Results, you can:
Review detected movements
Check reps and rounds
Edit anything that looks incorrect
Confirm workout structure
This step is important because confirming improves detection accuracy over time.
Step 7: Confirm Detection and Get Insights
After reviewing your draft results:
Tap Confirm
WurQ will finalize your workout
You will then receive:
Workout insights
Movement breakdown
Heart rate by movement
Pacing analysis
Workload metrics
Performance trends
This is where WurQ turns your workout into performance data and insights.
Summary Flow (Quick Overview)
Complete onboarding (wear, connect, pair sensors)
Choose Freestyle or Programmed WOD
Connect sensors and pass orientation check
Start workout (timer starts on first movement)
Stop workout when finished
Upload (1–50% sensors → 50–100% cloud)
Processing → Draft Results
Confirm detection
View insights and metrics


Was this article helpful?
That’s Great!
Thank you for your feedback
Sorry! We couldn't be helpful
Thank you for your feedback
Feedback sent
We appreciate your effort and will try to fix the article